Sunday, March 18, 2012

To my Leaky Old Boat

Darling, you are the love of my life. You are always the prettiest girl at the dance, and you've always been there for me when I've needed you the most, but we need to have a little chat.

Now don't get me wrong, I would never jump ship and leave you out in the rain, but you need to stop leaving me in the rain. Why is it you refuse to stop leaking at your mast boot? I've already bought you three rolls of boot tape, I don't know what else to do. Must I continue to shower you with gifts and get no better treatment in return? And your portholes... Darling, you have to stop letting water in at your portholes. I have to get some sleep ya' know? I come home from a long hard day in the sun and all I get from you is "drip, drip, drip." Just tell me what to do and I'll do it. I'll do whatever I have to in order to make things better, but we can't keep going on like this!

You can be so high maintenance sometimes. You never say it, but I can tell by the hum of your bilge pump that you want more attention. It's as if you are constantly reminding me that if I stop caring you'll be gone. I already know that. Don't be so insecure, just because you are getting a bit older doesn't mean I don't want you any more. You're perfect for me. I'll even promise to stop glancing over at that Extreme 40, she's not my type anyway.

I hope you don't take this too hard, I only want to make things better between us. Besides, you'll feel a lot better once you stop leaking anyway. I know what will make you feel better, how about tomorrow we spend the whole day together and I'll take you out for some new sail covers?
Read more >>

Thursday, March 15, 2012

Wiring your Solar System

Yesterday I wrote about how to choose the components of your solar system. Now that everything is all picked out it's time to put it all together. Today I'll discuss how to wire up and install your new solar system.

There are four main components in your system, the panels, the charge controller, the batteries, and your boat's common connection. Each must be connected in order to benefit from those flashy new panels you just got in the mail. I'd like to start with a simple diagram, then explain it further as we move on.

click above to enlarge

Above are the four main components that we spoke about, and that I helped to choose in my previous article. The above diagram is for 12v panels, and 12v batteries. You'll want to have panels that work on a 12v system for sure, but there are other battery options, such as 6v batteries that I'll mention later.

Since your charge controller is meant to operate on a 12v system as well, it will have a range of voltages that it can operate at. It's important to read your manufacturer's specifications to make sure that you are not feeding your charge controller with too much voltage, otherwise you'll get that nasty "burning electrical components" smell in your boat, and that's the sort of smell that we're trying to avoid here. In order to not give the charge controller too much voltage, the panels are wired parallel. Parallel wiring doubles the amperage output, but leaves the voltage the same. To wire them parallel the panel's positive connections are wired together, as well as their negative connections, as shown above. Then a positive connection from one end of the circuit and a negative connection from the other end of the circuit is fed into the input on the charge controller.

Your charge controller will accept the current coming from your solar array and adjust the voltage and amperage to either charge your batteries, run your vessel's equipment, or both. The charge controller's output is fed directly to your vessel's main positive bus and it's negative ground. Your positive bus is a power distribution block that all of your electrical components are wired to, and your negative ground is where all of your equipment is grounded. On your boat, you should have a good negative ground that leads to the water. On many vessel's it may be the copper strips your SSB radio is wired to, or to your keel. If you can find the other negative connections then you're probably safe connecting the charge controller's negative output there.

The batteries in the above diagram are of the 12v variety. Since all of the equipment on the boat needs a 12v connection, we want to keep their voltage at 12v, even though there is two of them. In order to keep the voltage the same we are again going to wire them parallel. Positive to positive and negative to negative. This make's the 2 batteries in the bank act as one larger battery. It keeps their voltage the same and adds their amperage.

What about 6v batteries?
If you have two 6v batteries in your bank, then you will need to wire them in a series to double the voltage so that your equipment is getting the 12v that it needs to run. No problem. Instead of connecting the positives to the positives and negatives to negatives, simply do the opposite. One battery's positive must go to the other's negative, as shown to the right. The rest of the system can be wired as usual. Make sure that when connecting to the vessel's main bus the connections are made from opposite ends of the battery bank, as in a positive from one battery and a negative from another. This makes sure that your batteries are both drained and charged evenly, extending the life of your battery bank.


What if I've got four 6v batteries?
Then you have two options. You could either put them in separate banks, or get fancy with the wiring to keep the bank at 12v. On my boat, I have two separate banks that I can switch back and forth between with a switch like this one. Using that switch I can charge and run my system with just one battery bank or use both. But let's have a look at the wiring. To keep the system at 12v you'll have to use a combination of both series and parallel wiring as shown below.


In this diagram there are four 6v batteries. The two on the left are wired together in parallel, so that their combined voltage is still 6v. The same is true with the two batteries on the right. However, the orange wire in the middle that connects the four together puts each group together in a series, making the combined total voltage of the entire bank 12v.

There are still a few other options when wiring up your solar system that I have not covered but this article covers most situations. If you are having any trouble wiring your system, or want to add components that are not mentioned please leave me a comment and I'll be happy to walk you through the process.
Read more >>

Wednesday, March 14, 2012

Choosing a solar system for your boat

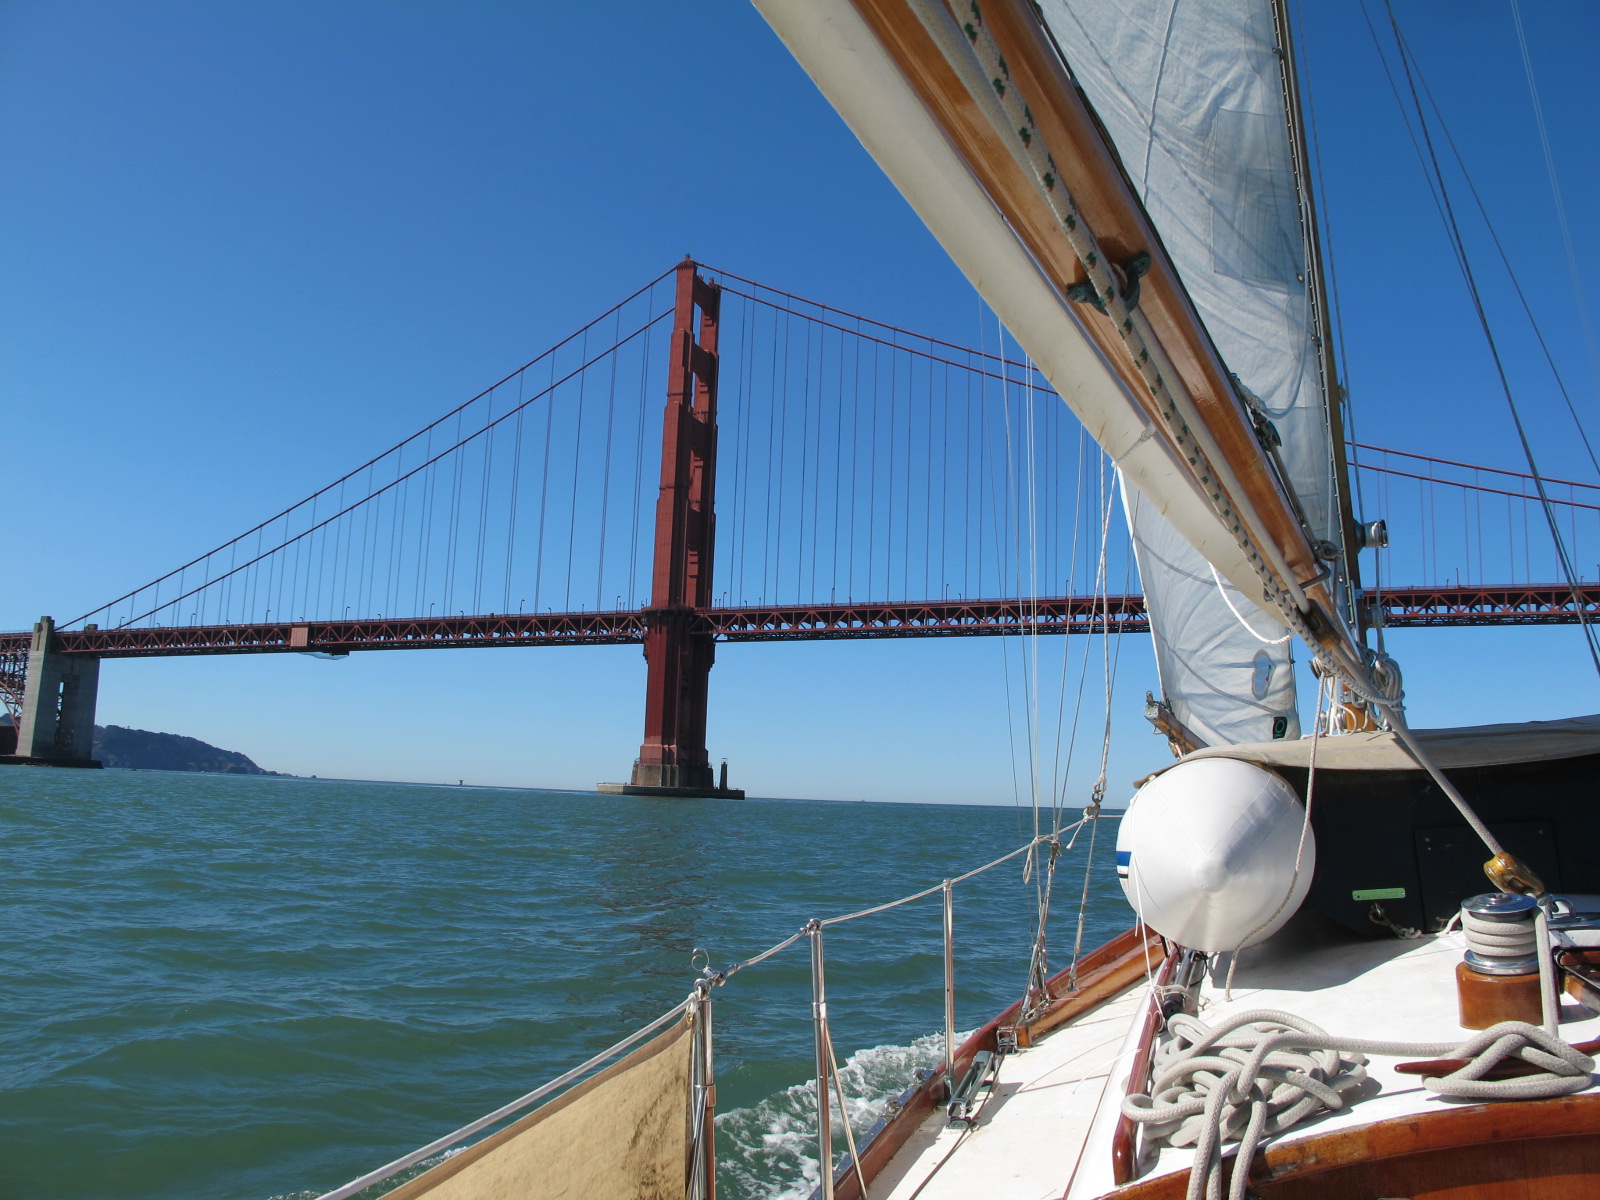
My favorite bits of equipment on my yacht is by far our solar panel array and battery banks. It's great to have the sun silently making power for us every day. Lots of cruisers opt for a wind generator and solar setup, but on Echo I decided to go completely solar. There are no moving parts, nothing to service, and the system is completely silent unlike wind generators. There is more than enough power to operate the vessel's systems.

Since I love the panels so much, I'd like to help others that are trying to install a solar system. This is a how-to describing choosing the panels and size of the system, what kind of charge controller to get, and what batteries to choose. In a separate post I've discussed how to wire up your system.

How much power will you draw?
This is always the big question. If you make the system too big it looks bulky and is too expensive, and if it is too small you'll end up having to conserve amps and constantly monitor your ammeter, praying for sunny days. The first thing to do is make a list of what will be using power, including how many amp hours each item uses. Products list how many amps they draw per hour, and this figure is expressed in amp hours. For example, my autopilot draws on average 4 amps an hour, if I use it for two hours then it uses 8 amps. Your power usage list should include how many hours a day you plan to use each piece of equipment as well. As an example, this is what Echo's power usage list looks like:
Manufacturers generally list the amp hour draw of their products somewhere in the instructions, on the packaging, or online. However, the above list is just an estimate. Items that I have aboard often draw more or less than their average. For example, I listed the amperage draw at 0.2 for the marine VHF. When it is merely on and standing by it is drawing 0.2 or less, however when it is receiving it is drawing 0.5 and when it is broadcasting it is drawing as much as 4 amp hours. The same point is relevant with items like the stereo system and the autopilot. In heavier seas or with weather helm the autopilot has to work much harder, drawing more amp hours. The stereo's draw is directly related to the volume it is played at. 

With all of that in mind, Echo can draw far more or far less on any given day, but it is still important to have a rough idea of what you'll be drawing.

How big of a solar system do I need?
Now that you have an estimate on your daily usage, you can appropriately size your system. To me, it was important that every day my batteries could fully recharge after a long night of drawing power and not producing any. However, solar panels are rated in watts, not amps! Deep cycle batteries are then sold with a rating on how many amps they hold, so it can get a bit confusing but it's really quite easy using this simple formula:

                      Watts = Volts x Amps

When using this formula to judge the amperage output of a solar cell, it is important to keep in mind that 12v solar panels operate at a maximum power voltage of 17.5. So when using the formula for solar panels, use 17.5 for volts. Here is a good example for a 100 watt solar panel:

                      100 = 17.5 x Amps
                      Amps = 100/17.5
                      Amps =  5.7

So in solving that formula, I just found that a 100 watt panel can produce 5.7 amps an hour at maximum capacity, since panels are rated at their maximum output capacity. Now you may think, "GREAT! my 100 watt panel will put out 5.7 amps for 12 hours of sunlight a day." That's simply not so. Generally you can rely upon 3-5 hours of maximum output, with the rest of the light hours of the day producing significantly less. If I had to estimate the daily output of a 100 watt panel I would do it like this:

                     4 hours @ 5.7 amps = 22.8
                     2 hours @ 4.0 amps = 8      
                     2 hours @ 2.0 amps = 4
                     3 hours @ 1.0 amps = 3

                     Total Daily Output  = 36.8 amps  

The above is of course an estimate, since it's impossible to predict cloud cover and other contributing factors, but I think it's about right for a 100 watt panel. Now that you know how many amps one panel will produce, it's time to choose the size of your battery bank.

Sizing the Battery Bank
Deep cycle batteries are rated on how many amps they can store. A medium size, group 31 lead acid battery like the ones I have aboard Echo for example can store 130 amps each at 12 volts. I have four, wired into 2 separate banks giving me 260 amp hours per bank with a total storage capacity of 520 amp hours. Now, not all of those 520 amps are usable. A battery can be drained to roughly half it's capacity before it stops putting out the 12 volts necessary to run the equipment aboard. So while I have batteries that are rated capable of storing 520 amps, only 260 of those amps are usable before the battery needs a recharge. Since I figured that I will draw roughly 130 amps a day, I can operate all the vessel's equipment for 2 days without any charge.

As a guide, battery banks should be rated (by the manufacturer) for 4 times the amount of amperage you plan to use every day. Some may say that this is overkill, and too many batteries, but I take comfort in knowing that I have plenty of power for whatever I desire and even if the solar panels were to malfunction I could reduce consumption and run the vessel for several days.

You're also not always drawing power from the batteries. Once they are fully charged during the early part of the day, all of my equipment runs directly off the panels, keeping the full charge in the batteries. My system generally fully recharges my batteries by 11am after a long night of running lights, autopilot, and stereo. After 11am the autopilot runs directly off of the power produced by the panels, as well as all my other equipment. This amperage allocation is handled by a smart charge controller, which is what we'll talk about next.

The Charge Controller
A charge controller will do the job of regulating amperage flow to your 12 volt system. Every solar system needs a charge controller of some kind. Mine measures the battery bank's charge and charges it appropriately, switching between trickle, acceptance, and bulk charges. When the battery banks are full, it will also put amperage directly to the equipment that is being used. It does this because it is a MPPT controller. There are different types of charge controllers available on the market today, but when choosing a charge controller spend a few extra dollars and get an MPPT controller. MPPT stands for maximum power point tracking, and is a technology that intelligently manages the power put out by your panels and can equal a claimed 20-30% higher charge rate than other types of controllers. Most modern MPPT controllers are 95% or more efficient, and will do a much better job than others when charging and maintaining the quality of your battery banks. It is very important to get a charge controller that is rated high enough for your application. If your charge controller is only rated for 20a output and you figured your solar panels can put out 30a on a sunny day then you'll inevitably fry it.

What panels?
Now that you know the size of the system you need, it's time to choose your panels, batteries, and controller for your system. Solar panels are not all created equal. There are different technologies behind them, different panels convert sunlight in different ways and are made of different materials. The two most common types of rigid panels used for 12v systems like the one on your boat are monocrystalline panels and polycrystalline panels. The difference in technology comes from the number of crystals a solar cell is cut from, but this is not a science course. If you want to learn more about the different types of technologies then this is a simple and easy to understand guide. All that we need to know is that monocrystalline panels are more efficient but also more expensive. On Echo I sprung for the more efficient monocrystalline panels, but both types will work just fine and it is completely up to you to choose. No matter what the technology, a panel rated at 100 watts is still a 100 watt panel.

It's also important to consider the quality of the panels themselves. Do they come from a reputable company? Is the frame made of a high or low grade aluminum? Are they well sealed for a marine environment? There are hundreds of different solar panel manufacturers out there, so do a bit of research and read some reviews to get an idea of what other people like. I chose 95w panels made by a company called ET Solar and they are of a very high quality and are working flawlessly.

What kinds of Batteries?
Battery technologies also vary widely. For this application a deep cycle battery is what will be needed, so we will focus on the different kinds of deep cycle batteries. There are two main kinds deep cycle batteries used in a marine environment, lead-acid batteries and absorbed glass matt batteries. Each will do the job well, but each is also a trade off in price, reliability, maintenance, and ease of use.

Lead Acid: inexpensive, easily available around the world, require maintenance and monitoring

AGM: will charge faster, are sealed and require no maintenance, are 3-5 times the cost of lead acid, generally larger for the same amount of storage capacity

It's up to you to decide between a lead-acid and AGM battery, but for my application I went with lead-acid batteries. The cost of an AGM was quite prohibitive, as well as the fact that I have limited space for installation and they were a bit bulky. I may choose to convert one of my battery banks to AGM batteries later on, and will comment on the performance.

The next thing to consider is what voltage of batteries to get. Lots of cruisers swear by 6 volt golf cart batteries, citing their deep charge capacity as well as limited amount of required maintenance. When choosing a 6 volt battery it is very important to take the amount of rated amps and halve it. A 6 volt battery will be rated to hold many more amps, but it is holding those amps at 6 volts. At 12 volts, the amount of amperage is halved. Since we're talking about 12v systems here, you'll need to figure the rated storage capacity for 12 volts. Basically, if that 6v battery you are holding has a big sticker on the top stating it's storage capacity is 200 amps, that's 100a @ 6v, at double the voltage you'll have 100a of storage capacity on that particular battery. Also, if choosing 6v batteries know that you must wire them for 12v. Two 6v batteries wired in a series will put out 12v, and act as a single 12v battery. But we're just choosing the system here, more on the wiring in this post. I simply went with 12v batteries wired parallel for my system, it was what was available at the time and they are working really well.

I hope this guide has shed a little light on the different choices that are to be made when designing a solar system for your vessel, any questions can be left in the comment form and I'll be happy to answer them to the best of my ability.
Read more >>

Monday, March 12, 2012

Review: Svendsen's Boat Works

Svendsen's Boat Works is a great establishment offering a range of services in Alameda Marina, located in Alameda, California. When I bought Echo, I didn't realize how lucky I was to have had my boat docked in the vicinity of Svendsen's.


More than anything else, I used their chandlery the most. It's a great little chandlery with knowledgeable and helpful staff. It's not the kind of place that has ridiculous t-shirts strung up next to over-priced gear, but instead the sort of place that can help you find the most obscure little part. If they don't have it (they probably do), they can find it for you or are happy to refer you to a place that can help. One of the greatest benefits of shopping for all my marine gear at Svendsen's is their new boat account. New boat owners can bring in their freshly signed bill of sale and get a special account that affords them deep discounts. My new boat account got me anywhere between 20% and 50% off of their already lower retail prices, depending on the item. 

The metal working shop is also a credit to Svendsen's name. Chris, the manager of the metal working shop, was more than helpful and never tried to sell me unnecessary upgrades. He is a boater himself and understands cruisers trying to work on a budget. I would simply go in there with an idea and he would help me along the way, turning it into a reality in a cost effective and quality manner. It was great to work with him because he knew what I wanted right away, and even had some great suggestions. They do great work there as well. The quality of their stainless work is of a superyacht standard.

Svendsen's rig shop made me a new set of standing rigging as well. Their labor prices are competitive, and all the new hardware qualified for a discount with my new boat account at the chandlery. I don't think I could have gotten new standing rigging cheaper. Not only that, they worked with the obscure fittings on my antique boat, and really guided me as to the best way to order and install the rigging myself. 

I also hauled the boat out in their boatyard for a few weeks. They put up stands that fit properly, treated my varnished topsides with care, and did their best to make sure I had a good environment to work in. Their helpful and friendly staff are a real credit and the staff is the whole reason I stuck around there.

Originally, I was planning on hauling the boat out and doing a large majority of the work in Mexico. Why? It's cheaper of course. Much cheaper. However, I just couldn't leave behind the chandlery where I was getting deep discounts. I couldn't leave behind the friendly staff around the boatyard. It was a one minute walk from my boat to any of their services offered, I didn't even have to get in a car to go and grab the odd nut or bolt. I knew I was going to get quality service at Svendsen's, so why would I go? In the end, after considering the discounts at the chandlery and the money saved by working with their metal working shop I probably spent the same amount of money as if I were to have done all the work here in Ensenada. For a do-it-yourselfer Svendsen's Boatworks is a great asset to have on your side, and I would fully recommend it to anyone that is doing the smallest little job or fully outfitting a boat to do ocean crossings.
Read more >>

Saturday, March 10, 2012

San Francisco to Ensenada

After six and a half days at sea we have arrived in beautiful Ensenada. Our first big voyage went extremely well and it bolstered confidence in both ourselves and our yacht. Left is a photo of our actual track on the chartplotter, and below is a breakdown of each day. Click on any photo on the page to enlarge.


March 3rd, Day 1
We were well prepared the night before and all that needed to be done was to top up the fresh water reserves for the last time and cast away the lines. We left Alameda Marina with calm winds and a clear sky at 0855. It was a great feeling, and Tine and I had wide smiles across our faces. The anticipation was over and the journey had begun. Winds in San Francisco Bay were inconsistent at best, and we had to leave our motor on until we had passed Alcatraz Island. Finally, the sails were hoisted and under full sail we left the bay, leaving the Golden Gate Bridge behind us and putting out into seemingly endless blue. We had picked a great day to leave, considering the good weather, but it was almost too calm. Four knot breezes struggled to push us along at a satisfying speed but they later picked up and by 1630 Echo was sailing at a graceful 6.5 knots. It was a cold clear night. At ten degrees celsius with a fresh breeze over the decks it was good to have invested in some decent foul weather gear.

March 4th, Day 2
The day began with a flat sea and light winds, only managing to give us a maximum of 5 knots. With such light winds I poled out our gennaker and dragged the boat by the forestay. She performed well this way, giving her less weather helm and really giving the tiller pilot an easier task. Again, we were cold at night but still too excited to notice much or care. Each night we were doing a watch schedule of 4 hours on then 4 hours off, and a good watch was particularly important on the second night as the fog was so dense it reduced visibility to less than ten meters at times.

March 5th, Day 3
The breeze had really freshened up, and the entire day we made over six knots under a sunny sky. It was a great day for sailing. It wasn't really blowing the direction I wanted, but we managed just fine once we got the proper sails up. The atmospheric pressure was falling rapidly, and I was keeping a close eye on the barometer because the forecast for the next day was looking a bit grim. Of course I had checked the weather before leaving, but as everyone knows extended forecasts are unreliable on a good day. NOAA weather radio had predicted 20 knot winds on the 6th of March, but now NOAA issued a gale warning, predicting winds in excess of 45 knots for the 6th.

March 6th, Day 4
Every sailor has stories about big storms and heavy seas. I won't be telling any long yarns with unrealistic exaggerations, but this was a big storm that lasted all throughout the day and night of the 6th. Knowing that it was coming, I woke Tine up early in the morning to drop the main and set the storm jib. Then it came just as expected. The winds easily reached the 45 knot mark, getting over 50 during gusts. Echo pounced over five meter seas doing 5-8 knots under the storm jib alone. I considered turning her to windward to ease the motion of her, but since she was holding together well I kept her on a broad reach and we carried on. King Neptune was showing his might, testing our little yacht and her crew, but we managed quite well. Every time we opened up the hatch to get on deck water would pour in. Waves constantly crashed over the decks, the wind was whistling through the rigging, and the creaks and groans of her wooden hull could constantly be heard. Every time she reached the peak of a big wave and plunged back down to a trough there was a huge banging sound, and even standing on two feet was a difficult task that could only be accomplished with two hands for bracing. There were lots of little leaks that we found during the storm, but one porthole in particular was leaking badly. We tried to replace the seal as fast as possible, but before we could secure the hatch a big wave gushed in and soaked both of us and the interior of the boat. We were in a proper storm, but the more we endured the more my confidence in this great little vessel grew. Echo was loving it.

March 7th, Day 5
What a contrast to the day before. On the morning of the fifth it was almost as if Neptune was apologizing for his tantrum and giving us a rest. The seas were flat calm. We hoisted the main, put up the genoa, and made 7 knots on a calm sea. It was a beautiful day to be out sailing, and we appreciated it even more after the storm.

March 8th, Day 6
It was another great day to be at sea, and Ensenada was nearing. It was an uneventful day of making 3-5 knots, and we were still catching up on re-arranging the boat after all our belongings had been tossed from one side of the vessel to the other. At night we were getting quite close, and I didn't want to arrive in Ensenada at 4am, so we circled around for a while to postpone our arrival until daybreak. The lighthouse at the entrance of Bahia de Todos Santos was in sight all night, our arrival was nearing.

March 9th, Day 7
What a glorious day! The only thing that could have improved our day was a bit more wind, as we only had a one knot breeze and had to motor into port at daybreak. Just upon entering the bay, a humpback whale breached just ten meters off the bow of our boat, coming up for air several times and giving us a good look at his awesome proportions. Playful seals came alongside, and an entire pod of dolphins came to play in the waves off our bow. A warm front had just moved in, and we changed into our shorts and t-shirts to bathe in the sun and take in all the wildlife in the bay. Rather than go directly to the marina, we circled the bay several times to watch dolphins and look for more whales. Around noon we tied up at Marina Coral. We had arrived and had the most remarkable day. After all that sailing, 665 nautical miles, we had reached our destination and we were beaming with happiness even if a bit exhausted and landsick.

Look for the next update on our time in Ensenada. If you're enjoying the posts and want to continue to follow Echo's voyage across the Pacific Ocean then I encourage you to sign up to be a follower of the blog. You'll get an e-mail every time I make an update, and won't be subjected to any spam. If you already are a follower and aren't seeing any e-mails then make sure to check your spam filter and flag the messages as not spam. I've heard that not everyone is getting the e-mails and it seems that certain spam filters want to weed them out.

Read more >>

Friday, March 2, 2012

Setting sail tomorrow morning

After all of our preparations, Echo is finally setting off to sea. I have found a great weather window and we'll be setting sail this Saturday morning on the 3rd of March. It's time to get out there and start betting it all on my last couple months of preparing day and night.

Tomorrow's wind is shifting to the Northwest, calming, and the air is warming up. A nice little high pressure system is meant to follow me south. Coming out of San Francisco Bay, after sailing under the Golden Gate Bridge, we will reach sixty miles Westward before gybing south in order to avoid heavy traffic around the traffic separation schemes. From there we will attempt to hug the coastline, staying eighty or so miles off the coast while on a broad reach, later changing to downwind sailing.

Our next port of call is Ensenada in Mexico. We'll be stopping for any necessary repairs. However, if all goes well and no immediate repairs are necessary we'll skip Ensenada altogether and head Southwest directly towards the Marquesas.

Echo is ready to go, and so is her crew. We can't wait to get out there. Look for an update from Ensenada or Hiva Oa.

I've also added a new photo album of Echo's varnishing job finished. Tine and I worked hard on her and all the work really shows.
Read more >>

Sunday, February 26, 2012

Echo will be leaving soon

We are pushing onward with Echo's preparations for her voyage across the great Pacific Ocean, and our progress has been noted by everyone who passes. Every day, Tine and I hear people saying "beautiful yacht you have there," commenting on her fresh coats of varnish. So many people walk by and tell us how good of a job we are doing. We are recieving huge amounts of positive encouragement and interest in our project. It's great to have such a large number of well wishers and awe struck eyes glaring at our little yacht. Unfortunately, we have been confronted with more than just well wishing and encouragement. There are a certain few people out there that don't want to see us carry on, and don't want to see us set sail for distant shores.

Echo is a true classic, with a great history. She was built in Stockton, California in 1957 by the Stephens Brothers along with 18 other Farallon Clippers. The Farallon Clipper fleet has been described to me by more than one person as the "pride of California." They have a good reason to be a source of pride as well. Each Farallon clipper is meticulously built to an old world standard, and is a true testament to the Stephens Brothers as a shipyard. A sense of quality craftsmanship oozes from every perfectly joined seam.

In order to keep track of every Farallon Clipper, and to document each and every one so that they are not forgotten, they have been cataloged in a museum. Moreover, an owners association, consisting of the owners of the remaining 17 Farralon Clippers has been formed. Each and every year the clippers meet at two seperate regattas, one being the Master Mariner's Regatta here in San Francisco. The Master Mariner's Regatta takes place in May, and apparently there are quite a few people that are upset about Echo not being able to make an appearance.

More than once I have heard of grumbling old men that don't want Echo to go anywhere. They want her here, so that twice a year she can put out her dress flags, slap on a brand new topcoat, and put out her cushions so that she can be flaunted. I've had shipwrights that refuse to work on her, stating that she shouldn't leave California. I can't even hardly walk into the local chandlery any more without someone commenting negatively on Echo's pending voyage. I'm getting quite exhausted by the recent negativity, and I'd like to address this issue since it has become apparent that is is of great importance to some.

I have purchased this beautiful, classic sailing vessel with every intention to maintain and refurbish her in a way that restores her originality and keeps her one of the most gorgeous boats aloat. Before I bought her, she had been for sale for over two and a half years, waiting for someone with the time, energy, and inevitably money that she so desperately needs to stay in such great shape. During her time up for sale, any one of these grumbling, naysaying folks could have bought her and maintained her. They could have done their part to preserve her rich history, and if they so choosed they could have left her in the same berth, waiting for her moment to be shown at some upscale regatta. None of them were interested, especially when the cost in both time and money were involved. They let her sit, waiting to rot from a lack of use. Now that I have taken on the massive task of caring for this old classic, the whining has begun. Now that it is my pocketbook and my efforts that are on the line they are happy to loudly complain about her future overseas. Echo was not meant as a daysailer, or meant for champagne sipping at the annual haughty tauty regattas. Echo was built for the sea, and that is where I am going to take her.

Echo began a transformation when I took over as her new skipper. She has shed her old varnish and paint, and is starting anew. She is changing from a daysailer to an ocean voyager. I plan to use her as she was intended to be used, stripping her of the monotony of simply sailing around San Francisco bay and tying up before dark. Now she will be prettied up with a fresh coat of varnish every two months. Her rigging will be renewed, her quirks and un-original features mended and fixed. She will be maintained in bristol fashion, so as to provide a safe journey overseas. Now that she has begun her new life as a sea going vessel she will constantly be under my care. Every day I will maintain her, and look out for her best interests. Echo is my one and only obsession, and she is already gleaming because of it.

So to all of those that are disappointed in seeing her leave her known harbor, it is important to know that she is being looked after with the utmost care. No, she will not be making her annual appearance at this May's Master Mariner's Regatta, she will be moving on to bigger and better things. If this fact still causes feelings of unrest, then I must bluntly state this to the restless: Anyone could have bought Echo while she was sadly waiting, for sale for years. The grumblers could have bought her and kept her here in San Francisco if they could only have mustered the effort. More likely the case, someone with big dreams and no sense of the reality of owning a wooden vessel could have bought her. The grumblers and whiners would certainly have not liked to see her fall into a state of disrepair in the hands of a lofty dreamer. Worse still, she could have been bought by a liveaboard, secretly planning to cut a hole in her cabin top to fit a new window air conditioner. Fortunately for Echo, I have bought her and dedicated all of my time in maintaining her beauty and seaworthiness. So what is it that the grumblers are really grumbling about? It's simply the fact that they won't get to glance at her twice a year when they get together for a few posh cocktails on the docks.

I will continue to take great joy in the positive comments and well wishings that I so frequently receive. It is a real joy to own such a gorgeous vessel with a rich history and large following. Every day I love my yacht more and more. I can understand some reluctance in watching her sail overseas, she is indeed a unique example of quality craftsmanship right here in California. What everyone else needs to understand is that her history does not disappear when she leaves the port of San Francisco. Echo will be a testament to her builders in any port she calls upon, and the reputation of the Farallon Clippers will spread globally as she makes her way across the South Pacific. Echo has a rich and interesting future, and I can't wait to get her out there in the big blue.

Read more >>

Monday, February 20, 2012

Preparations

Just over a week ago Echo's first crew member arrived from Denmark. I knew that I would not want to be at sea all alone for weeks on end, and also knew that experiences are never quite the same unless you have someone to share them with. I met Tine, my new crewmember, on a website for sailors seeking crew; FindaCrew.net. All of our numerous e-mails and exchanges paid off. It turns out that we get along really well and she has been a great help in getting Echo ready for her voyage across the South Pacific.

A few days ago I had Echo pulled from the water and put on the hard to get some much needed work done. Tine and I have stripped off all the old varnish, sanded her, and just today been able to put on the first of 10-12 coats of fresh varnish. Through hull fittings have been added and checked, some minor caulking has been done, Echo has a new set of zincs and soon a fresh new coat of bottom paint.


I have put together a photo album of the preparations aboard Echo, click here to view it.

Since having her up on the hard, Echo has drawn an extremely large amount of attention from passers-by. Sometimes it's difficult to get work done because so many people stop to admire her and ask questions. She really is the star of the show around here, the entire Marina is interested in the boat, the upcoming voyage, and in hearing about my constant preparations. Every day several people tell me how beautiful she is, or how good of condition she is in. She really is a beautiful old classic, and this new varnish will really bring out the best in her.
Read more >>

Friday, February 17, 2012

Makin' Power

Preparations are well underway on the sailing yacht Echo. My father visited for some time and we worked into the late hours to get her ready for her epic voyage. While we were able to get lots of work done, I am happiest about getting the solar panels completely mounted and wired up. Just the other day I tossed out the old battery charger, and have begun to rely completely upon the sun. It's amazing to be making my own power and living off of the grid on my self contained little cruiser.

Here is a layout of the electrical system I will be cruising with:
  • Four 95 Watt ET Solar mono-crystalline panels putting out a maximum of 22 amps an hour
  • A Blue Sky MPPT solar controller, regulating the charge to my battery banks
  • Four group 31 lead acid batteries, wired into 2 separate banks. Each battery is capable of storing 130 amps, giving Echo a total of 520 amps of storage.


From my calculations I think I'll have plenty of power to run everything I need aboard Echo during her voyage, only having to turn off the autopilot if I get several days of absolutely no sun.

While my father was here, we even managed to get Echo out on the bay. It was great to have his help, and even better to have the company. Thanks dad, I wish there was more time for sailing and relaxing while you were here but your time was greatly appreciated.

Read more >>